MediaCP Manual
    1. Getting Started
    2. Sales Questions
    3. Frequently Asked Questions
    4. Transcoder System Benchmarks
    5. Start your own streaming platform
    1. Product Licensing
    2. Change account currency
    1. Introduction
    2. Installation & Upgrade
      1. System Requirements
      2. Versions & Releases
      3. Installation
      4. Upgrading
      5. SSL Certificates
      6. Streaming Servers
        1. Nginx-Rtmp Video Server
        2. Wowza Streaming Engine
        3. Flussonic Media Server
        4. Video Feature Comparison
        5. Icecast 2 / Icecast KH
        6. Shoutcast 2
    3. Billing Integration
      1. Clientexec Integration Guide
      2. Blesta Integration Guide
      3. WiseCP Integration Guide
      4. WHMCS Integration Guide
      5. Billing Platform Comparison
    4. Migrate from other software
      1. Migrate From AzuraCast
      2. Migrate From Centovacast
    5. Backup & Restoration
      1. Backup MediaCP
      2. Restore MediaCP
      3. Transfer to another server
    6. Administration
      1. MediaCP System Commands
      2. Admin Tools
      3. Custom Web Service Configurations
      4. Change MediaCP domain name
      5. Port 80 / 443 Proxy
      6. Move media to another hard disk
      7. Custom Language Translations
      8. Custom Facebook App
      9. Branding Your Panel
      10. Secure your server
      11. Setup CSF Firewall
      12. Troubleshooting Login Errors
      13. Reset Admin Password
    7. Scaling
      1. Nginx-Rtmp with CloudFront CDN
      2. Nginx-Rtmp with CDN Proxy
      3. Scale with Wowza and CloudFront CDN
    8. Troubleshooting
      1. Troubleshooting Wowza Streaming Engine
      2. FTP Troubleshooting
      3. MySQL Database Troubleshooting
      4. Reporting Troubleshooting
      5. Troubleshooting Liquidsoap AutoDJ
      6. Video Relay Troubleshooting
      7. Disk Troubleshooting
      8. Grant access to support team
    1. Introduction
    2. Administrators Dashboard
    3. System Configuration
      1. General
      2. Services
      3. Video Players
      4. Albums
      5. Email
      6. Plugins
      7. Statistics
      8. Backups
      9. Custom HTML
      10. Misc
    4. Customer Accounts
      1. Managing existing Customers
      2. Create a new Customer
      3. Deleting a Customer
      4. Login as another Customer
      5. Send email to Customer
      6. Reset Customer Password
    5. Reseller Accounts
      1. Create a Reseller Account
      2. Reseller Plans
    6. Administrator Accounts
      1. Create a new Administrator
    7. Media Services
      1. Creating a Media Service
      2. Deleting a Media Service
    8. Announcements
      1. Managing Announcements
      2. Creating Announcement
      3. Deleting Announcement
    9. Statistics
    10. Software Health
    11. Software Updates
    12. Email Templates
    13. API
    1. Introduction
    2. Audio Operation Manual
      1. Basics 101
      2. Station Overview
      3. Media Library
      4. Playlists
        1. General Rotation
        2. Jingles & Advertising
        3. Scheduling
        4. Repeat Protection
      5. Live DJ Connections
      6. Live Stream Recording
      7. DJ Manager
      8. Fallback, Backup and Intro Files
      9. Country Blocking
      10. Public Page
      11. HTML5 Player
      12. AutoDJ Crossfade
      13. Stream Proxy
      14. Stream Authentication
      15. Widgets & Links
      16. Reporting
    3. Video Operation Manual
      1. Basics 101
      2. Service Overview
      3. File Manager
      4. Scheduling
      5. Streaming to Your Service
      6. Stream Targets
      7. GeoIP Country Locking
      8. Public Page
      9. Widgets & Links
      10. Reporting
    4. Reseller Operations Manual
      1. Reseller Dashboard
      2. Customers
      3. Media Services
    5. API
    1. Custom Domain Names
    2. Wowza and Flussonic on same system
    3. Submit a feature request
    4. Build and Publish Custom Roku Channel App
    5. Shoutcast 2 Admin Guide
    1. Getting started with Audio Streaming
    2. Shoutcast 2 Live Broadcasting
    3. Icecast Live Broadcasting
    4. Broadcasting with AutoDJ
    5. DJ Accounts
    6. GeoIP Country Locking
    7. HTML5 Audio Player
    8. Mount Points
    9. Managing Your Media
    10. Managing Media Using FTP
    11. Statistics
    12. Shoutcast 2 Premium
    1. Getting started with video streaming
    2. Live Streaming Overview
    3. TV Station Overview
    4. Ondemand Video Streaming
    5. GeoIP Country Locking
    6. VAST Advertising
    7. Relay & IP Camera
    8. Stream Recording
    9. Connecting your encoder
    10. Preparing Your Media Files
    11. Managing Media Using FTP
    12. Understanding Video Playlists
    13. Embedding player on your website
    14. Smooth Streaming and Content Transition
    15. Video Transcoding (Adaptive Bitrate Streaming)
    16. Stream Watermark​
    17. DVR Rewind
    18. Statistics
    19. Facebook Live Streaming
    20. Youtube Stream Publishing
    21. Twitch Stream Publishing
    22. Shoutcast 2 Stream Publishing
    23. Icecast Stream Publishing
    24. RTMP Stream Publishing
    1. Cloud Video Overview
    2. Admin Manual - Cloud Video
      1. Dashboard - A First Look
      2. Branding your platform
      3. Team & Staff Members
      4. Plans & Customers
      5. WHMCS Billing Provisioning Module
      6. Login to your cloud platform
      7. Activating VOD on Customer Plan
      8. API
    3. User Manual - Cloud Video
      1. Login to your video platform
      2. First Look
      3. Creating a Channel
      4. Channel Overview
      5. Broadcasting
      6. Broadcasting with OBS
      7. Stream Transcoding (ABR)
      8. Stream Watermarking
      9. Recording
      10. Media Content
      11. Live Events
      12. 30 Minute Rewind
      13. Fallback Video
      14. TV Channels - 24x7 UGC
        1. TV Event Scheduling
        2. Channel Guide Widgets
      15. Video on Demand
      16. Relay Channels
      17. VOD Playlists
      18. Publishing
      19. Bandwidth Utilisation
      20. Viewing Analytics
      21. Publish Zoom Meetings
      22. Advertising
      23. Restreaming IP Cameras
    4. Video Guide Series
    5. Streaming Best Practices
    6. Feature Comparison
    7. Roadmap & Release Notes

Build and Publish Custom Roku Channel App

Last updated 7 days ago

Roku channels let content creators distribute media directly to millions of Roku users, expanding your reach across an engaged audience. By leveraging Roku’s platform, you can showcase diverse content formats—from live streams to on-demand videos—in a custom channel tailored to your brand’s vision.

Launching a custom Roku channel enables you to:

  • Reach More Audiences: Tap into Roku’s large user base and connect with viewers who actively seek streaming content.
  • Seamless Streaming: Provide an accessible, high-quality streaming experience for an easy seamless viewing experience for viewers.
  • Brand Expansion: Enhance your brand’s presence and engagement, allowing for deeper connections with your audience.
  • Monetization: Explore revenue options through Roku’s built in monetization offerings.

These benefits combine to empower content creators with the tools they need to build lasting relationships with their audience while driving growth and revenue.

Prerequisites

  • A Roku device
  • Access to Roku’s Developer Program
  • A compatible HLS URL for your livestream 

How to Build Your Own Roku Channel

This github repository holds an example configuration for a Roku app that streams an ABR broadcast from MediaCP Cloud Video: 🔗 Example Stream

We will be using MediaCP Cloud Video as our source for our ABR enabled live stream. MediaCP Cloud Video is a white-labeled enterprise video streaming platform designed for service providers and powered by AWS and a global CDN. We will be using the HLS link from the our demo platform as it is automatically formatted correctly Roku, Fire TV and more. If you have your own compatible HLS link the guide should work for you as well.

We will start with our pre-made roku-example app as a template, then customize it match our branding and live stream content.

Steps to Set Up Your Roku Channel:

  1. Start by downloading the roku-example app from the following link: https://github.com/mediacontrolpanel/roku-example/archive/refs/heads/main.zip
  2. Gather a roku compatible HLS link. On MediaCP Cloud Video this can be found on your channels by selecting the Player Code button and copying the Direct HLS Link.
  3. Edit the MainScene.brs file to use your own HLS stream. Replace “https://cdn.mycloudstream.io/hls/live/broadcast/viducc7f/index.m3u8” with your own stream link. I will be using the link we just gathered from our  MediaCP Cloud Video channel.
...
sub SetupVideoContent()
    videoContent = CreateObject("roSGNode", "ContentNode")
    videoContent.streamFormat = "hls"
    videoContent.url = "https://cdn.mycloudstream.io/hls/live/broadcast/viducc7f/index.m3u8"
    videoContent.title = "MediaCP Example"
...

    3. Edit the main.brs file to also use your HLS stream by replacing the same url:

...
        videoContent = CreateObject("roSGNode", "ContentNode")
        videoContent.streamFormat = "hls"
        videoContent.url = "https://cdn.mycloudstream.io/hls/live/broadcast/viducc7f/index.m3u8"
        videoContent.title = "Live Stream"
...

    4. Edit the manifest file to set the name of your channel and channel details:

# Channel Details
title=MediaCP Live Stream
major_version=1
minor_version=0
build_version=00001
...
# Channel Information
description=A channel that streams live media content.
provider_name=MediaCP
...

    5. Replace the image files with your own splash screen and icons in Roku’s expected resolutions:

File Name
Resolution
icon_focus_hd.png
290x218
icon_focus_sd.png
246x140
splash_fhd.jpg
1920x1080
splash_hd.jpg
1280x720
splash_sd.jpg
720x480

    6. Compress the entire directory for upload to your Roku Device:

cd your-roku-app-directory/
zip -r my-roku-channel.zip manifest source components images

Package & Test the Roku Channel App:

You will need a Roku Device in developer mode, in order to test and package your new app.

  1. Activate develop mode on your Roku device by following the official Roku Guide
  2. Write down the URL of your Roku device that is displayed on the screen and the password you set during developer mode setup.
  3. View the Developer URL and login with “rokudev” and the password you set
  4. Sideload the app onto your Roku device by uploading the zip file we made on Step 6
  5. After being uploaded the app should startup on your Roku device, check to ensure it is working as intended.
  6. Follow Roku’s official guide to generate a signing key for your app.
  7. Select the Packager button on the top right of the Roku Developer page and package the app for deployment. You will need to use the signing key password from the last step in order to complete this.
  8. Down the packaged app to your computer.

Now that your app is tested and published, you just need to create a Roku Developer account and build your channel application in order to publish it to the Roku App Store.

Publish your Roku Channel App:

You will need a Roku Developer account in order to publish your new app.

  1. Login to your Roku account on the Roku Developer website, this will grant you access to the developer dashboard.
  2. After logging in visit the Roku Developer Dashboard
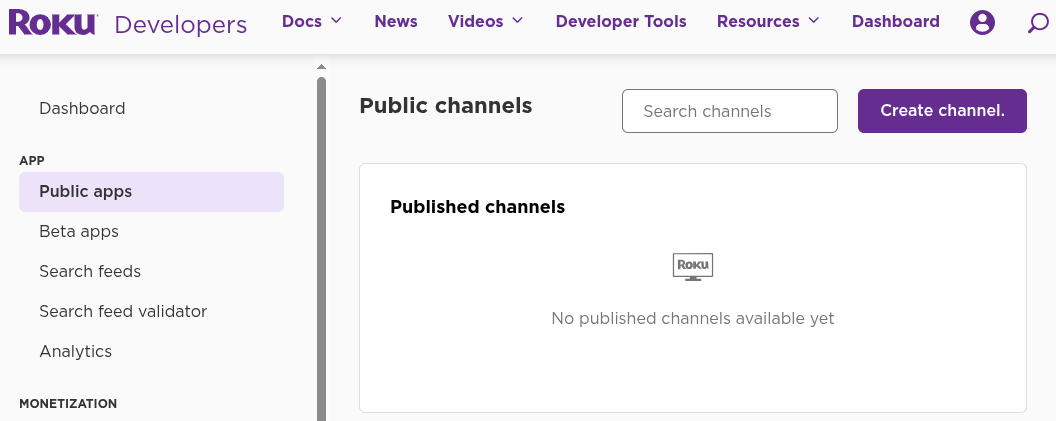
  3. Navigate to Public Apps and select Create Channel
  4. Set your Channel name, Language and Countries
  5. Go through each of the categories to set your Store Listing and Channel Properties ensuring each is checked off in the dashboard.
  6. Select Channel Package and upload the .pkg file we packaged and downloaded earlier
  7. Save and Run the Static Analysis, if the channel passes then you can complete the rest of the categories until the Schedule Publish button is available. 
  8. After selecting Schedule Publish you can now set the schedule date and wait to see your app on the store.

🎉 Congratulations! Your Roku app should now be published on your selected date, with your customers able to download and view your stream using it. 

Table of Contents