MediaCP Manual
    1. Getting Started
    2. Sales Questions
    3. Frequently Asked Questions
    4. Transcoder System Benchmarks
    5. Start your own streaming platform
    1. Change account currency
    2. Product Licensing
    1. Introduction
    2. Installation & Upgrade
      1. System Requirements
      2. Versions & Releases
      3. Installation
      4. Upgrading
      5. Streaming Servers
        1. Nginx-Rtmp Video Server
        2. Flussonic Media Server
        3. Icecast 2 / Icecast KH
        4. Video Feature Comparison
        5. Wowza Streaming Engine
      6. SSL Certificates
    3. Billing Integration
      1. WHMCS Integration Guide
      2. Clientexec Integration Guide
      3. Blesta Integration Guide
    4. Migrate from other software
      1. Migrate from Centovacast
    5. Backup & Restoration
      1. Backup MediaCP
      2. Restore MediaCP
      3. Transfer to another server
    6. Administration
      1. Custom Web Service Configurations
      2. Reset Admin Password
      3. Port 80 / 443 Proxy
      4. MediaCP System Commands
      5. Change MediaCP domain name
      6. Move media to another hard disk
      7. Secure your server
      8. Troubleshooting Login Errors
      9. Custom Facebook App
    7. Scaling
      1. Scale with Wowza and CloudFront CDN
      2. Nginx-Rtmp with CloudFront CDN
    8. Troubleshooting
      1. Grant access to support team
      2. Troubleshooting Wowza Streaming Engine
      3. FTP Troubleshooting
      4. MySQL Database Troubleshooting
      5. Reporting Troubleshooting
      6. Troubleshooting Liquidsoap AutoDJ
      7. Video Relay Troubleshooting
    1. Introduction
    2. Administrators Dashboard
    3. System Configuration
      1. General
      2. Services
      3. Video Players
      4. Albums
      5. Email
      6. Plugins
      7. Statistics
      8. Backups
      9. Custom HTML
      10. Misc
    4. Customer Accounts
      1. Managing existing Customers
      2. Create a new Customer
      3. Deleting a Customer
      4. Login as another Customer
      5. Send email to Customer
      6. Reset Customer Password
    5. Reseller Accounts
      1. Reseller Plans
      2. Create a Reseller Account
    6. Media Services
      1. Creating a Media Service
      2. Deleting a Media Service
    7. Announcements
      1. Managing Announcements
      2. Creating Announcement
      3. Deleting Announcement
    8. Statistics
    9. Software Health
    10. Software Updates
    11. Email Templates
    12. API
    1. API Documentation
    2. Custom Domain Names
    3. Shoutcast 2 Admin Guide
    4. Wowza and Flussonic on same system
    5. Submit a feature request
    6. Wowza Custom Properties
    1. Shoutcast 2 Live Broadcasting
    2. DJ Priorities
    3. HTML5 Audio Player
    4. Broadcasting with AutoDJ
    5. Shoutcast 2 Premium
    6. Mount Points
    1. Getting started with video streaming
    2. Live Streaming Overview
    3. TV Station Overview
    4. Ondemand Video Streaming
    5. Relay & IP Camera
    6. Connecting your encoder
    7. Managing your media files
    8. Embedding player on your website
    9. Video Transcoding (Adaptive Bitrate Streaming)
    10. Image Logo or Watermark Overlay on Video Stream
    11. nDVR Live Streaming
    12. Shoutcast 2 Stream Publishing
    13. Facebook Live Streaming
    14. Youtube Stream Publishing
    15. Icecast Stream Publishing
    16. Twitch Stream Publishing
    17. Periscope Stream Publishing
Migrate from Windows to Linux

Last updated 2 years ago

General Migration Notes

  • Before migrating to a new server, we recommend upgrading to the latest version of the MediaCP.
  • A valid license is required to complete the restoration process.
  • Transferring of files can often take hours to complete, be sure to leave enough time before terminating your old server.
  • Before completing a migration, you should request that both old and new server IP addresses be added to your software license.
  • The restoration process will prompt you for a custom media content path if you wish to relocate your media files to another disk during the migration

Wowza Streaming Engine Notes

  • If you have custom Wowza Streaming Engine configurations, such as multiple VHosts configured, you are required to migrate these configurations manually to the new server once the MediaCP is deployed on the new server.
  • If you have configured a custom Ondemand Directory from Admin -> System Config -> Plugins -> Wowza Streaming Engine, then you must manually copy this directory to the new server and specify the new path after migration.

1. Prepare DNS records

It is highly recommend to lower the Time To Live (TTL) of your DNS records to 300 before migration.

2. Create Linux compatible backup file

Complete the following process to create a migration/backup file that is compatible with Linux.

  1. Download and save the latest version of the installation software:
    http://install.mediacp.net/MediaCP-Install.exe

  2. Run MediaCP-Install.exe

  3. Select option [4] Linux Migration
 
Once completed, the backup file will be placed in C:/

3. Transfer backup to new server

The easiest way to transfer the backup to the new server is directly via SSH connection using a utility such as WinSCP.

  1. Install WinSCP on your Windows Server
  2. Open WinSCP and connect to your new Linux Server
  3. Upload (drag and drop) the backup file from C:/ drive into /root/

4. Restore the MediaCP

The restoration utility will perform the following:

  1. Install MediaCP
  2. Install Wowza Streaming Engine (if supported by license)
  3. Restoration will then automatically replace MediaCP files, database and media content with the backup from your windows server
  4. Attempt to start all your media services

Start the restoration utility with the following command on the new server
cd /root;rm -f init;wget http://install.mediacp.net/scripts/init;chmod +x init;./init restore

a) You will be prompted for your license key and the path to the backup file.

b) You will also be prompted to specify a location for your media content files. If you wish to leave this as default, simply press return. If you wish to install the media files to a different location, you may do so here and a symlink will be created automatically from /usr/local/mediacp/content to the new location.

The path to the backup file should be similar to /root/mediacp_201911180000.tar
(be sure to replace mediacp_201911180000.tar with the name of your backup file).

5. Check new server is running appropriately

We recommend thoroughly testing your panel before switching DNS records.

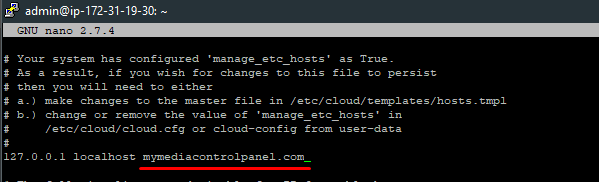
Firstly, on your new server in SSH open /etc/hosts (nano /etc/hosts) and ensure your domain name is mapped to the loopback address 127.0.0.1. See the below image example

You can do this by updating your systems hosts file to point your domain name at the new server, so only you can see the new server and your customers will still access the original server.

Open your systems hosts file:

  1. Navigate to C:\Windows\System32\drivers\etc 
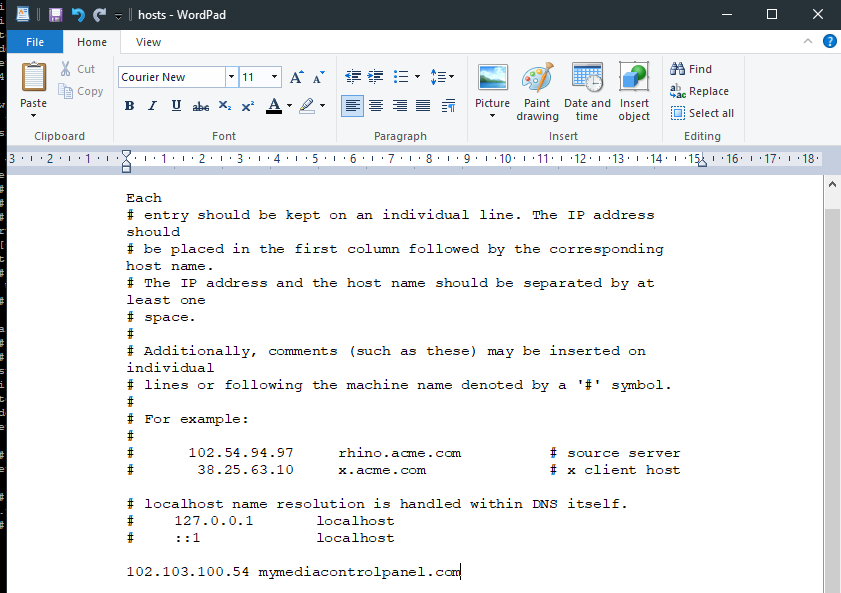
  2. Right click hosts file and Open with “Wordpad”
  3. Add a new line containing your new servers IP Address and your domain name, separated by a single space. It should look like the below.
  4.  Close all instances of your web browser then start it again and you should be accessing the new server.
 
Once you have successfully tested the new server, remove the line from the hosts file and restart your web browser again.

6. Update DNS Records

a. Wowza Streaming Engine StreamLock

  1. Login to wowza.com Portal
  2. Select the StreamLock tab
  3. Scroll down and select the Change link next to your stream lock certificate
  4. Input your new servers IP Address and press save

b. MediaCP Domain Name

Update your DNS record to point to the new server.

Table of Contents